 By Claire Whitaker
Updated November 2026
An under sink organiser kitchen setup turns the dim, crowded cabinet beneath your basin into usable storage. In this guide you will measure the space, plan zones for cleaning supplies and food, work around the drain and water supply lines, install the organisers and keep moisture from ruining them. Most of the work takes an afternoon and needs only basic tools.
Why the Under Sink Cabinet Gets So Messy
The space under a kitchen sink is awkward. The drain trap and supply lines take up the center, the cabinet is often shallow, and the door opening is narrow. Owners often report that items get pushed to the back and forgotten, while bottles tip over every time the door is opened. A good under sink organiser kitchen layout solves those problems by lifting items off the floor of the cabinet, separating categories and keeping plumbing accessible.
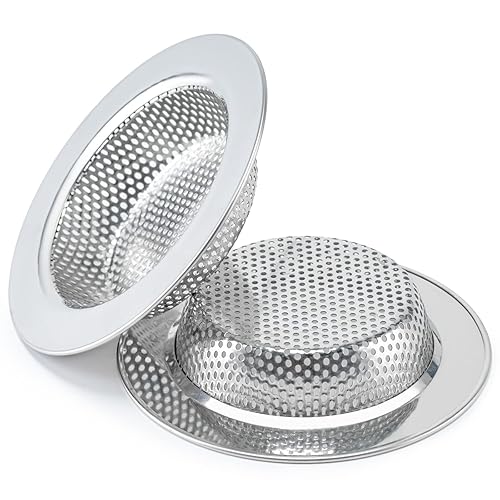
Shopping for one? See our guide: 6 Best Sink Strainers for Kitchen Sink (2026): Expert Picks.
Step 1: Empty and Measure the Cabinet
Start by removing everything and wiping the cabinet floor and walls. Then measure the usable space at three points: the width at the front, the width at the back (cabinets are sometimes narrower at the back because of the hinge side), and the depth from the door opening to the back panel. Measure the height from the floor to the underside of the sink basin, and note how far the drain pipe and water shut-off valves project into the cabinet.
- Cabinet width (front and back)
- Cabinet depth
- Usable height under the basin
- Position of the drain trap, P-trap arm and shut-off valves
- Door opening height for pull-out units
Keep at least 2 inches of clearance around the trap and valves so you can reach them during a leak or clog. Many plumbers recommend leaving the valves fully accessible, and that rule should guide your layout.
Step 2: Choose the Right Organiser Type
Under sink organisers generally fall into four types, and most kitchens combine two of them.
| Type | Best for | Main limitation |
|---|---|---|
| Tension rod or spring rod | Hanging spray bottles and sponges | Limited weight capacity |
| Pull-out tray or drawer | Frequently used bottles and small tools | Needs clearance for the trap and valves |
| Stacking shelves or lazy Susan | Cans, pots of cleaners, bulk supplies | Can block access to plumbing if too tall |
| Wire baskets on the cabinet door | Sponges, gloves, small bags | Only suitable for light items |
If you have a tight cabinet, a shallow pull-out tray with a cut-out for the trap usually gives the most usable space. A wide cabinet with open floor space can handle a two-tier shelf or a corner-style organiser.
Step 3: Plan Zones for Cleaning and Food Items
Group items by how often you use them and how they should be stored. Keep cleaning supplies at the front, where you can reach them without moving anything. Place heavy items low and light items high. Store nothing that can leak or freeze near the valves.
- Front zone: everyday cleaners, dish soap and sponges.
- Side zone: refills, extra bottles and tool kits.
- Back zone: rarely used items, trash bags and recycling bags.
- Door zone: gloves, scrubbers and small wipes.
Some owners also keep a small bin for recycling or a compost pail on a side pull-out. Only do this if your cabinet has room that does not interfere with the disposal or trap.
Step 4: Install the Organisers Without Blocking the Plumbing
Install the base organiser first, then add accessories. Follow these steps.
- Mark the position of the trap and valves on the cabinet floor with painter’s tape.
- Assemble the pull-out or shelf unit outside the cabinet, following the manufacturer’s directions.
- Place the unit inside and check that it clears the trap by at least 1 inch and the shut-off valves by at least 2 inches.
- Secure floor-mounted units with the screws supplied, driving them into the cabinet base rather than the thin back panel.
- For tension rods, extend the rod so it is snug between the cabinet sides, then test that it holds with light pressure before adding weight.
- Run the faucet and check the trap and connections for drips before loading the cabinet.
If you need to reroute or replace a drain component to make room, check the basic parts first. Our overview of Kitchen Sink Drain Pipe Parts: Identify, Replace and Install (2026) explains what each piece does, and it helps to know the names before you shop.
Step 5: Protect Against Moisture and Leaks
Moisture is the biggest threat to any under sink organiser kitchen setup. Water from a slow leak, a dripping sprayer or condensation on cold pipes can soak cardboard, rust metal shelves and warp wood.
- Choose plastic, coated steel or stainless organisers rather than bare metal or unfinished wood.
- Place a waterproof liner or shallow tray on the cabinet floor to catch drips.
- Keep cleaning bottles upright and tightly capped to prevent leaks from pooling.
- Inspect the cabinet floor and the trap joints every few months for staining or soft spots.
If you spot a steady leak, shut off the valves before you do anything else. Persistent drips at the faucet or sprayer may point to a worn component, and No Water Pressure at Kitchen Sink? 5 Best Fixes and Parts Compared covers several common causes that can affect the same area.
Step 6: Keep the Cabinet Working Over Time
Once the organiser is in place, plan a short maintenance routine. Empty and wipe the cabinet every few months. Check that pull-out runners still close smoothly and that items have not drifted onto the trap. If you notice a slow drain or odor, the cause is often in the trap or waste line rather than the organiser. Our step-by-step notes on Kitchen Sink Plumbing Drain Guide: Fix Slow Drains in 6 Steps can help you work through the likely causes.
Step 7: Final Check and Load Plan
Before you refill the cabinet, run through a quick checklist.
- Trap and valves are clear by at least the distances listed above.
- Organiser is secure and does not shift when pulled.
- Heavy items are on the lowest level.
- No chemicals are stored directly against the valves or pipe joints.
- Door opens and closes without catching on the organiser.
Common Mistakes
- Blocking the trap. A shelf that sits on the trap makes it hard to unscrew during a clog. Leave room to reach it.
- Overloading thin shelves. Stacking heavy jugs on a light wire shelf can cause it to sag or collapse.
- Ignoring the drain slope. Some organisers push items against the drain line, which can crush or kink flexible hoses.
- Storing bleach near metal parts. Mixing cleaners is dangerous, so keep chemicals separated and never store bleach alongside ammonia-based products.
- Skipping the leak test. Run water before loading the cabinet so a hidden drip does not ruin your stock.
Tips for a Tidier Cabinet
- Decant refills into labelled squeeze bottles so the same shape fits each slot.
- Use a narrow caddy for sponges and brushes so they drain and dry instead of sitting in water.
- Measure again after any plumbing repair, since a new trap or hose can change the usable space.
- Choose organisers that can be removed for cleaning.
Recommended gear
These items are commonly used in under sink storage projects. Check fit against your measurements before buying.
- Sink Pull Out Organizer Rack is a practical choice for narrow cabinets because the tray slides out so you can reach the back without removing the trap.
- Simplehuman Under Sink Pull Out Organizer offers a sturdy frame with adjustable components, which helps around plumbing. View on Amazon
- Rubbermaid Sink Tray works as a liner or catch tray that protects the floor from drips and condensation. View on Amazon
- iDesign Tension Rod Under Sink Organizer is useful for hanging spray bottles and sponges without drilling into the cabinet. View on Amazon
FAQ
How much clearance do I need around the drain trap?
Plan for at least 1 inch of clear space around the trap and 2 inches around the shut-off valves so you can reach and turn them during an emergency.
Can I use a pull-out organiser with a garbage disposal?
Yes, but keep the organiser away from the disposal unit’s wiring and the drain connection. Check that the unit can slide out without contacting the disposal body.
What materials hold up best in a damp cabinet?
Plastic and coated or stainless steel are the most common choices for damp areas. Bare steel rusts and unfinished wood swells, so avoid both.
Should I store cleaning chemicals under the sink?
Many households do, but keep them upright, sealed and out of reach of children, and never store bleach near acidic or ammonia-based cleaners.
How often should I clean the cabinet?
A full clean every three to six months is typical, with a quick wipe after any spill. Frequent checks help catch leaks early.
My cabinet is very small. What should I do?
Use a narrow tension rod for sprays and a shallow tray for small bottles. Avoid tall stacking units that block the trap or valves.
When should I call a plumber?
If you see persistent leaks, corroded fittings, soft spots in the cabinet floor or repeated clogs, consult a licensed plumber rather than attempting major repairs yourself.
Conclusion
A well-planned under sink organiser kitchen setup gives you usable storage without blocking the plumbing or inviting moisture damage. Measure first, leave access to the trap and valves, and choose materials that tolerate damp conditions. A quick maintenance routine will keep the cabinet tidy and help you spot leaks before they become costly problems.
Related reading
Ready to choose one?
About Claire Whitaker
Claire Whitaker is part of our editorial team and reviews and edits our kitchen faucets & sinks guides, checking product details against manufacturer specifications and owner feedback.