 By Claire Whitaker
Updated November 2026
A kitchen sink plumbing drain is the path wastewater takes from the basin, through the strainer, trap, and branch line, out to the main sewer or septic system. In this guide you will learn how each part of that path works, how to tell which section is blocked or leaking, and the step-by-step fixes that resolve most slow or smelly drains. Most homeowners can handle the first four steps themselves; the last section explains when to call a licensed plumber.
How a Kitchen Sink Plumbing Drain Is Built
Knowing the parts makes troubleshooting far easier. A standard kitchen sink drain system includes the following components, listed in the order water travels through them:
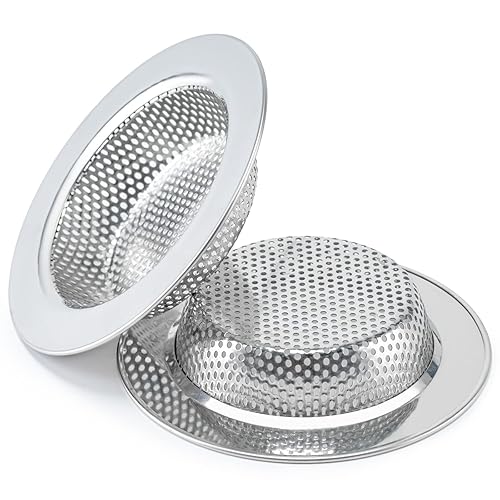
- Strainer or basket: The removable piece at the bottom of the basin that catches food and debris.
- Drain flange and tailpiece: The connector that runs from the sink bottom down to the trap.
- P-trap: The curved U-shaped pipe under the sink. It holds a small pool of water that blocks sewer gas from entering the room.
- Trap arm and wall connection: The horizontal pipe that carries water from the trap into the wall drain.
- Branch drain and vent: The larger line that carries wastewater to the main stack. The vent lets air in so water flows smoothly.
Most clogs form in the strainer, the trap, or the first few feet of the trap arm. Clogs deeper in the wall are less common but cause the most severe backups, often affecting more than one fixture at once.
Diagnose the Problem Before You Start
Before you reach for tools, spend two minutes narrowing down the cause. Run hot water for 30 seconds and watch what happens:
- Water drains slowly only from the kitchen sink: Usually a clog in the strainer, trap, or trap arm.
- Water backs up in the sink and the dishwasher or second basin also drains slowly: The clog is likely in the shared branch line, which may need a drain auger.
- Water backs up into a floor drain, shower, or tub: A main line problem. This is typically a job for a professional.
- Gurgling sounds with slow drainage: Often a venting issue rather than a true clog.
- Drips or damp spots under the sink: A leak at a slip nut, washer, or trap joint, not a clog.
If the basin drains normally when the strainer is removed, the problem is further down the line. For general clearing methods, see How to Unclog a Kitchen Sink: 6 Methods That Work Fast.
Step-by-Step: Clear and Inspect the Drain
Step 1: Clean the Strainer and Stopper
Remove the strainer basket and clear any grease, coffee grounds, or food particles. Clean the flange underneath, since a film of grease there can slow flow significantly. If you are choosing a replacement, 6 Best Kitchen Sink Drain Strainer Picks for Every Sink (2026) covers the main styles.
Step 2: Place a Bucket and Protect the Floor
Set a bucket directly under the P-trap and lay down old towels. The trap typically holds about a cup or two of standing water, and it will spill when you open it. Keep a shallow pan nearby for the first drip.
Step 3: Remove and Clean the P-Trap
Loosen the slip nuts on both ends of the trap by turning counterclockwise. Most are designed to be loosened by hand, though a pair of channel-lock pliers wrapped with a rag can help. Once the trap is free, empty it into the bucket and inspect for grease, hair, or debris. Clean it with a bottle brush and rinse thoroughly.
Step 4: Check the Trap Arm and Wall Connection
With the trap removed, run a small hand auger or a flexible drain snake about 3 to 4 feet into the trap arm. Pull out any material you find. If the blockage is further in, use a longer drain auger from the trap opening.
Step 5: Reassemble and Test for Leaks
Reinstall the trap, making sure the slip nut washers are seated flat. Hand-tighten, then give each nut a quarter turn with pliers. Run water for two minutes and check every joint with a dry paper towel. Any moisture means a joint needs another quarter turn or a new washer.
Step 6: Flush the System
Run hot water for several minutes and then add a dishwashing detergent or a degreaser designed for drains. Avoid chemical drain cleaners in repeated doses, since they can damage PVC and stress older metal pipes.
Common Problems and Their Fixes
| Symptom | Likely Cause | Fix |
|---|---|---|
| Slow drain, sink only | Grease or food in trap | Clean trap (Steps 2 to 5) |
| Foul odor | Dry trap or biofilm buildup | Run water, clean trap, check trap seal |
| Drip at trap joint | Worn washer or loose slip nut | Replace washer, tighten nut |
| Multiple fixtures slow | Branch line blockage | Use drain auger from cleanout |
| Gurgling | Vent blockage | Check roof vent, call professional |
Tools and Supplies You Will Need
- Bucket and old towels
- Channel-lock or adjustable pliers
- Bottle brush for trap cleaning
- Hand auger (about 3 to 4 feet) or flexible drain snake
- Replacement slip nut washers in the correct size
- Plumber’s tape for threaded fittings
Recommended gear
A hand drain auger is the most useful single tool for clearing trap-arm clogs. A spare set of slip nut washers is inexpensive insurance, since a worn washer is the most common cause of a drip after reassembly. Keep a bottle brush dedicated to the drain so it stays clean between jobs.
- A flexible drain auger for trap-arm clogs. View on Amazon
- A replacement slip nut washer assortment for common trap sizes. View on Amazon
- A long bottle brush for scrubbing the inside of the P-trap. View on Amazon
Common Mistakes
- Overtightening slip nuts: Plastic nuts can crack. Hand-tight plus a quarter turn is usually enough.
- Forgetting the washers: Reassembling without the washers is a common cause of leaks.
- Relying on repeated chemical cleaners: These can weaken pipe joints and irritate skin and eyes. Use them sparingly and follow label directions.
- Ignoring recurring clogs: A drain that clogs every few weeks may have a grade or venting problem. For broader cleaning routines, see How to Clean a Kitchen Sink: 5 Steps for Stainless and Porcelain.
- Skipping the leak test: A joint that looks fine when dry can drip under pressure. Always run water and check.
Tips for Keeping the Drain Clear
- Scrape plates into the trash before rinsing, and never pour cooking oil or bacon grease down the drain.
- Flush the drain with hot water after each use of the garbage disposal.
- Clean the strainer weekly and the trap every few months.
- Pair the drain with a quality strainer. 6 Best Sink Strainers for Kitchen Sink (2026): Expert Picks lists options that catch more debris.
- Keep stainless and porcelain surfaces clean to reduce buildup around the drain opening. How to Polish Stainless Steel Kitchen Sink in 5 Steps explains the process.
When to Call a Professional
Stop and call a licensed plumber if water backs up into other fixtures, if you smell sewage persistently, if you see water stains on ceilings or walls, or if you suspect a damaged pipe. Sewer and drain work can involve health hazards and building code requirements, so a professional assessment is the safe choice in these cases.
FAQ
How often should I clean the kitchen sink drain trap?
Most households benefit from cleaning the trap every three to six months. Homes that cook heavily with grease or have several people using the sink may need more frequent attention.
Why does my kitchen sink smell even when it drains?
Odors often come from a dry trap, which lets sewer gas rise into the room, or from biofilm and food residue inside the trap. Running water to refill the trap and cleaning the trap usually solves it.
Can I use a plunger on a kitchen sink drain?
Yes, especially when the sink is full of standing water. Block the second basin or dishwasher opening with a damp cloth first so the suction works on the correct drain.
What size are standard kitchen sink drain pipes?
Most residential kitchen sink drains use a 1.5-inch trap and trap arm, though older or specific installations may differ. Measure before buying replacement parts.
Do drain cleaners damage pipes?
Harsh chemical cleaners can damage PVC joints and corrode older metal pipes if used repeatedly. Mechanical clearing with a brush or auger is generally safer for regular maintenance.
Why does water gurgle when the sink drains?
Gurgling usually means air is being pulled through the drain because the venting is restricted or the trap is partly blocked. Check the roof vent if the problem persists after cleaning the trap.
Is it safe to fix a drain leak myself?
Replacing a washer or retightening a slip nut is a simple task for most homeowners. For leaks inside walls or from pipes you cannot easily access, consult a licensed plumber.
Conclusion
A kitchen sink plumbing drain is a simple system once you understand its parts, and most slow or leaking drains can be fixed with a few basic tools. Start by diagnosing where the problem sits, then work through the strainer, trap, and trap arm in order. Keep up with routine cleaning, and call a professional when the problem extends beyond the sink.
Ready to choose one?
About Claire Whitaker
Claire Whitaker is part of our editorial team and reviews and edits our kitchen faucets & sinks guides, checking product details against manufacturer specifications and owner feedback.