As an Amazon Associate we earn from qualifying purchases. This page may contain affiliate links.
Knowing how to clean a kitchen sink properly keeps it looking good and smelling fresh, and it protects the finish from damage that builds up over time. In most cases you can do a thorough clean in about 20 to 30 minutes with a few household products and a soft cloth. This guide walks through a basic routine, how to handle common stains and odors, the cleaners to avoid for each sink material, and a few habits that make the next cleaning easier.
What You Need Before You Start
Gather your supplies first so you aren’t stopping midway through. Most sink cleaning uses items you probably already have.
- Dish soap with a mild, non-bleach formula
- Baking soda, about a quarter cup for a standard basin
- White vinegar, for mineral deposits and odor
- A nonscratch sponge or nylon scrub pad
- A soft-bristle brush for the drain opening, faucet base and sink rim
- Two microfiber cloths, one for washing and one for drying
- Rubber gloves
- A toothbrush or old cloth for the faucet base and gaskets
Step 1: Clear the Sink and Rinse
Remove dishes, sponges, drying racks and any loose items from the basin and the surrounding counter. Rinse the sink with warm water to loosen food particles and grease. If you have a garbage disposal, run cold water and let the disposal run for about 15 seconds to flush debris out of the grinding chamber.
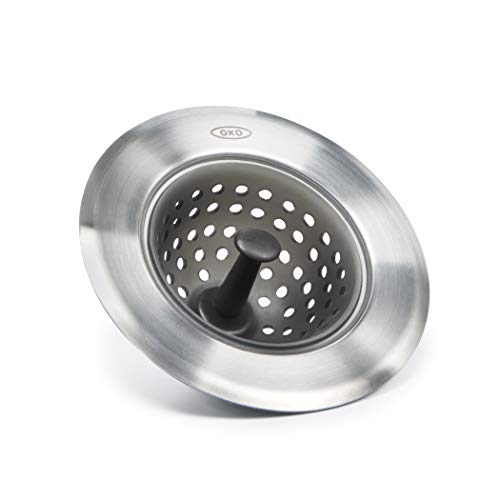
Check the drain stopper and strainer basket. Lift them out if they can be removed, and clean them separately. Food and soap scum often collect in these spots more than anywhere else.
Step 2: Wash the Basin and Rim
Squeeze a small amount of dish soap onto your sponge and work it across the basin in gentle circular motions. For stainless steel, follow the grain of the metal, which usually runs side to side across the bowl. Pay attention to the corners, the area around the drain, and the rim where the sink meets the countertop. Those spots hold grease and crumbs.
Rinse the sponge often so you aren’t spreading residue back across the surface. Dirty water and grit can leave fine scratches, especially on stainless.
Step 3: Treat Stains and Odors
Most sink stains fall into a few categories, and each needs a different approach. Start with the mildest option and move up only if needed.
Removing Food and Odor
Sprinkle about a quarter cup of baking soda over the wet basin, then scrub with a damp sponge or brush. Let it sit for five to ten minutes before rinsing. For odors that linger in the drain, pour about half a cup of baking soda down the drain, follow with half a cup of white vinegar, and cover the drain for a few minutes. Rinse with hot water afterward.
Hard-Water Spots and Mineral Film
Hard water leaves white or chalky rings near the faucet base and along the bottom of the basin. Wipe the area with a cloth soaked in white vinegar and let it sit for about 10 minutes. Scrub lightly and rinse. For heavy buildup, repeat the process rather than scrubbing harder. Gentle, repeated soaking is safer for the finish than aggressive abrasion.
Rust Rings and Stubborn Stains
Rust can appear around stainless steel fasteners or where a steel object has rested in water. Use a nonabrasive stainless steel cleaner or a paste of baking soda and water, rubbed gently along the grain. Avoid steel wool, since it can leave iron particles that rust on the surface. Rinse and dry completely afterward.
Step 4: Clean the Faucet, Handles and Base
The faucet collects more grime than most people expect, especially where the spout meets the deck plate and around the handle. Wipe the faucet body with a soapy cloth, then use a soft brush or toothbrush for the base, the spout joint and the area under the handle. If your faucet has an aerator on the spout tip, unscrew it and soak it in white vinegar for 30 minutes to dissolve mineral deposits. Rinse it and reattach it hand-tight.
If you have a pull-down or pull-out spray head, check the hose and the spray head for debris. For more on how these parts are built and where grime tends to collect, see Pull-Down Kitchen Faucets: How They Work and What to Check.
Step 5: Rinse, Dry and Polish
Rinse the entire sink with clean water, including the drain, the faucet and the countertop around the rim. Dry with a microfiber cloth. Drying matters because standing water is what leaves hard-water rings in the first place. For stainless, a light buff with a dry cloth gives a clean, even sheen. Avoid oil-based polishes on stainless, since they can attract dust and leave a film.
Cleaning Guidance by Sink Material
The right method depends on what the sink is made of. Manufacturers’ care instructions are the final word for any specific sink, but the general guidelines below apply to most common materials.
| Sink Material | Recommended Cleaners | Avoid |
|---|---|---|
| Stainless steel | Dish soap, baking soda paste, vinegar for spots, nonabrasive stainless cleaner | Steel wool, abrasive powders left to sit, bleach left in the basin |
| Porcelain enamel on cast iron | Dish soap, baking soda, mild non-abrasive cleaners | Harsh scouring powders, steel wool, metal scrapers that can chip the glaze |
| Fireclay | Dish soap, baking soda, vinegar for mineral deposits | Abrasive pads with coarse grit, strong acid cleaners left on the surface |
| Granite composite | Warm water, dish soap, mild non-abrasive cleaner made for composite | Bleach, oven cleaner, harsh acids and abrasive pads |
If you’re not sure what your sink is made of, check the manufacturer’s care sheet or the product listing from when you bought the sink. Keep the sink’s documentation with your faucet paperwork if you have it. Finish details also matter for the faucet itself. Our guide to Kitchen Faucet Finishes Compared: Looks, Care, Wear explains how different finishes respond to cleaners.
Recommended gear
A few inexpensive supplies make the routine faster and reduce the risk of scratching the basin.
- A nonscratch scrub pad with a nylon or soft-bristle face is a good choice for daily washing on stainless and porcelain, since it cleans without leaving fine lines in the finish. Check price on Amazon
- Microfiber cloths dry the sink without lint and help prevent water spots, which is the main reason to dry after rinsing. Check price on Amazon
- A stainless steel sink cleaner formulated to be nonabrasive helps lift fingerprints and light rust marks without the scratching risk of powdered scrubbers. Check price on Amazon
Common Mistakes to Avoid
- Mixing bleach and vinegar. Combining these two products releases chlorine gas. Use one, rinse the sink fully, and then use the other if you need both.
- Leaving bleach in the basin. Chlorine left on stainless for extended periods can cause pitting and discoloration. Rinse thoroughly after any bleach-based cleaning.
- Using steel wool on any finish. It scratches and can leave metal fragments that rust.
- Scrubbing against the grain on stainless. This makes scratches more visible and can dull the finish over time.
- Ignoring the drain and strainer. These collect the most odor-causing residue.
- Leaving standing water. Water left in the basin or on the faucet base is the main cause of mineral rings.
Tips for Keeping the Sink Clean Between Deep Cleanings
- Rinse the sink after each use, especially after cooking with oil or dairy.
- Wipe the faucet and handles daily with a damp cloth. This prevents the grime buildup that makes deep cleaning harder.
- Run hot water and a little dish soap down the drain once a week.
- Dry the basin and faucet after washing dishes if you have hard water.
- Clean the aerator every few months if your water has high mineral content.
If the faucet drips, sprays unevenly or loses pressure after cleaning, the problem may be inside the valve rather than on the surface. Our guide to Kitchen Faucet Maintenance: Cleaning, Leaks and Aerators covers the next steps. If the drain backs up or smells persistently after cleaning, consult a licensed plumber rather than using stronger chemicals, which can damage pipes and seals.
FAQ
How often should I clean a kitchen sink?
Wipe the basin and faucet daily, and do a deeper clean with baking soda or vinegar once or twice a week. Sinks used for raw meat or heavy cooking may need more frequent disinfection.
Can I use bleach to clean my kitchen sink?
You can use diluted bleach on some sink materials, but it is harsh on stainless steel and composite surfaces if left in place. Always rinse thoroughly and never mix bleach with vinegar or other cleaners.
What is the best way to remove hard-water spots from a faucet?
Soak a cloth in white vinegar, wrap it around the faucet base, and let it sit for about 10 minutes before wiping and rinsing. Repeat if the buildup is heavy. Remove the aerator for a separate soak.
Why does my kitchen sink smell even after cleaning?
Odor usually comes from the drain, the strainer basket or the disposal rather than the basin. Clean those parts, run hot water, and check for food trapped in the disposal. If the smell continues, a plumber can check the trap and drain line.
Is baking soda and vinegar safe for all sinks?
Baking soda and white vinegar are generally gentle on stainless steel, porcelain and fireclay. Avoid using vinegar on natural stone sinks, and check the manufacturer’s instructions for any specialty finish.