As an Amazon Associate we earn from qualifying purchases. This page may contain affiliate links.
Learning how to unclog a kitchen sink naturally usually takes less than an hour and a few household items. You will start with the gentlest method, a hot water flush, and work up through a baking soda and vinegar treatment, a plunger, and finally a manual cleanout of the P-trap under the sink. Most slow drains that come from grease, food scraps and soap buildup respond to one of these steps, and you will know when it is time to stop and call a plumber.
Why Kitchen Sinks Clog in the First Place
Kitchen drains rarely fail because of one big blockage. They slow down gradually. Cooking grease cools and coats the inside of the pipe, then food particles, coffee grounds, rice starch and soap scum stick to that film. Over weeks, the opening narrows until water pools in the basin.
Knowing the cause helps you pick the right fix. A sink that drains slowly after you wash greasy pans probably has a grease clog that hot water and a mild alkaline treatment can loosen. A sink that backs up only when you run the garbage disposal may have a food mass lodged past the disposal outlet, which calls for a different approach. A sink that gurgles when you drain water from the other basin often has a venting problem or a partial blockage further down the line.
Before you start, run a quick check:
- Is only one sink slow, or is the dishwasher or the tub also backing up?
- Does the water rise and drain slowly, or does it stay still?
- Does the drain smell sour or like rotting food?
- Is there a garbage disposal, and has it been running fine?
If more than one fixture is backing up, stop here and read the troubleshooting section at the end. The problem may be in the main line, and home remedies will not reach it.
Tools and Supplies You Will Need
Most natural methods use items you already own. For the P-trap step, you will need a few basic tools. Gather everything before you start so you are not searching for a bucket with a wet sink.
- Kettle or pot for heating water
- Baking soda (about one-half cup)
- White vinegar (about one cup)
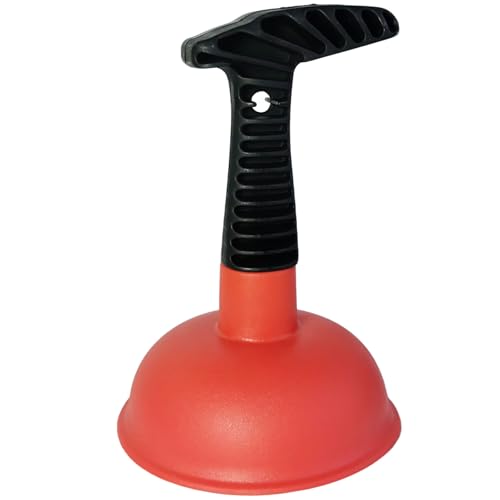
- A sink plunger with a flat or cup-style rubber head
- Old towels or rags
- Rubber gloves and safety glasses
- A bucket large enough to catch 1 to 2 cups of standing water
- Adjustable pliers or a pair of slip-joint pliers
- A small brush or old toothbrush for cleaning the trap
Method 1: Start With Hot Tap Water
This is the simplest test, and it sometimes solves the problem by itself. Hot water melts and rinses away fresh grease before it hardens.
- Remove the strainer or stopper from the sink.
- Run the hot tap at full force for two to three minutes. Water heaters vary, so if you have an older setup, check that the hot water is steaming before you pour more.
- Pour a full kettle of hot water (not boiling) slowly down the drain in two or three batches, waiting about 30 seconds between each.
- Run the hot tap again to see whether the water drains at normal speed.
Many plumbers advise against pouring boiling water into plastic pipes, especially older PVC or pipes with plastic trap parts. Very hot tap water is generally the safer choice. If your pipes are metal, you have a little more room, but the risk of splashing and scalding still makes a moderate kettle temperature the better option.
Method 2: Use Baking Soda and Vinegar
Baking soda and vinegar create a fizzing reaction that can loosen light residue and freshen the drain. The effect is mild. It works best on early-stage clogs and on odors caused by a thin film in the pipe. It will not dissolve a solid food plug.
Step-by-step
- Clear standing water as much as you can with a cup or a small bowl.
- Pour about one-half cup of baking soda directly into the drain.
- Follow with one cup of white vinegar. It will fizz right away.
- Cover the drain with a stopper or a wet towel for 15 to 30 minutes. Covering the drain keeps the fizzing reaction in the pipe rather than splashing back up.
- Flush with hot tap water for at least one minute to rinse out the loosened material.
Repeat once if the sink still drains slowly. Do not repeat more than twice in one session. If the water still does not move after two rounds, move on to the plunger.
Why this works, and where it stops
Baking soda is a mild base and vinegar is a mild acid. Mixed together, they produce carbon dioxide gas, which lifts loose debris and pushes it along the pipe wall. The reaction does not generate much force, so think of it as a maintenance step rather than a rescue.
Method 3: Plunge the Drain Correctly
A plunger uses pressure and suction to move the clog. Many people plunge badly, which wastes effort and can spray dirty water. A few adjustments make a big difference.
How to plunge a kitchen sink
- If your kitchen sink has two basins, plug the second one with a wet towel or its stopper. Air leaks from the other side will otherwise ruin the seal.
- Cover the drain opening fully with the plunger cup. Add enough water to cover the rubber cup, about two inches in the basin.
- Push down gently at first to expel the air, then pump firmly 10 to 15 times without breaking the seal.
- Pull the plunger off with a quick, upward motion to create a pressure change.
- Check the drain. If water moves, run hot water for a minute to flush the pipe. If not, repeat for up to three minutes.
Plunging does not work on every kitchen sink. If the sink has a garbage disposal, the plunger may not seal over the outlet. In that case, turn the disposal off at the switch, not the breaker, and plunge the main drain opening only.
Method 4: Clean the P-Trap by Hand
The P-trap is the curved section of pipe under the sink. Its job is to hold a small amount of water to block sewer gases. It is also where hair, grease and food pile up most often. Cleaning it by hand is the most effective non-chemical step, and it requires no chemicals at all.
Steps for a P-trap cleanout
- Place a bucket directly under the trap. Put towels around the area.
- Loosen the slip nuts on each side of the trap by turning counterclockwise. Hand-tighten first. Only use pliers if the nut will not turn, and wrap the nut with a rag to avoid marring the finish.
- Let the water drain into the bucket. Remove the trap and empty it.
- Clean the inside with a brush and rinse it in a utility sink or outside.
- Check the washers inside the slip nuts. Replace any that look flattened or cracked.
- Reassemble the trap, hand-tighten, then add a small amount of pressure with pliers if needed. Run water for a minute and check for drips.
If the clog is past the trap in the wall pipe, you can clean the trap section and then use a hand auger or drain snake into the open pipe. Insert the snake slowly, turning the handle clockwise, until you feel resistance. Work through the blockage, then pull the snake out and flush with hot water.
Comparing the Natural Methods
Not every method suits every clog. The table below shows where each one fits best.
| Method | Best for | Typical time | Main caution |
|---|---|---|---|
| Hot water flush | Fresh grease, slight slowdowns | 5 minutes | Avoid boiling water on plastic pipes |
| Baking soda and vinegar | Light buildup, odors | 30 to 45 minutes | Do not mix with commercial drain cleaners |
| Plunger | Mild to moderate clogs | 5 to 10 minutes | Block the second basin and disposal outlet |
| P-trap cleanout | Hair, food solids, grease plugs | 30 to 60 minutes | Keep a bucket under the trap and expect water |
Common Mistakes to Avoid
- Mixing chemicals. Never combine vinegar with commercial drain cleaner or bleach. If you used a chemical drain product earlier, rinse thoroughly and wait before trying baking soda. Mixed reactions can release fumes and damage the pipe.
- Using boiling water on plastic. As noted above, very hot tap water is safer for PVC traps and fittings.
- Skipping the second-basin block. Plunging a double sink without blocking the other side wastes effort and sends water and grime back toward you.
- Overtightening slip nuts. Plastic nuts crack easily. Hand-tighten, then add a quarter turn at most.
- Forgetting the washers. A worn washer causes leaks after reassembly, which can look like a new problem.
- Repeating one method endlessly. If two rounds of a method do nothing, switch to the next step rather than hoping for a different result.
Tips for Keeping Your Kitchen Drain Clear
- Pour cooking grease into a sealed container, not down the drain, even when it is warm and liquid.
- Scrape plates and pans into the trash or compost before rinsing.
- Use a fine mesh strainer in the basin to catch coffee grounds, rice and eggshells.
- Run hot water for 30 seconds after using the garbage disposal to clear the outlet.
- Once a month, do the baking soda and vinegar treatment followed by a hot flush. It is a low-cost way to slow buildup.
Faucet components can also influence how well water moves through the system. Sprayer hoses, aerators and cartridges have their own maintenance needs, and a clogged aerator can make the water stream look like a drain problem when it is not. For that side of the story, see Kitchen Faucet Maintenance: Cleaning, Leaks and Aerators, which covers how to clear faucet parts without touching the drain.
Recommended Gear
These items make the natural methods easier. They do not replace the steps above, but each one solves a specific problem you are likely to run into.
- A cup-style sink plunger. The rubber cup seals better on a flat sink basin than a flange plunger does, which gives you more pressure per stroke. Check price on Amazon
- A hand-crank drain auger. A short, flexible auger reaches past the P-trap into the wall pipe and pulls out hair and food mats that a brush cannot. Check price on Amazon
- A bucket and slip-joint pliers kit. A bucket with a sturdy handle and a pair of pliers with rubber grips let you open the trap cleanly without scratching the finish. Check price on Amazon
If a sprayer or hose is part of the problem, you may need to replace a worn part rather than clean it. Check the faucet manufacturer’s guide before ordering parts, since sprayer hoses and connectors differ between models.
When to Stop and Call a Plumber
Home methods can handle most kitchen clogs, but some situations need a licensed plumber. Stop and call one if:
- Several fixtures back up at once, which suggests a main line blockage.
- Water rises into the sink from a lower drain, such as a floor drain, when you run other water.
- Sewage smell persists after cleaning the trap.
- You see water seeping from the pipe joints or the cabinet floor after reassembly.
- The trap or wall pipe is damaged, corroded, or cracked.
If you are unsure whether a leak or backup is a safety risk, especially if sewage is involved, consult a licensed plumber before continuing.
FAQ
Can baking soda and vinegar fully unclog a kitchen sink?
Usually not on its own. The fizzing reaction loosens light grease and freshens the pipe, which can restore partial flow. Solid clogs made of food or hair typically need a plunger or a P-trap cleanout.
Is it safe to pour boiling water down a kitchen sink?
It can be risky. Boiling water may soften or damage certain plastic pipe joints and trap components, and it can splash. Very hot tap water is a safer first step, especially if your pipes are PVC.
How often should I clean the P-trap?
Many homeowners check it once or twice a year, or sooner if the sink drains slowly. Cleaning it by hand removes buildup that flushing cannot reach.
Can I use these methods if I have a garbage disposal?
Yes, with a few precautions. Turn the disposal off at the switch before plunging, and block the disposal outlet if your plunger seal leaks. Run cold water while the disposal is operating, and run hot water briefly afterward to clear the outlet.
When does a slow drain mean a bigger problem?
If more than one fixture backs up, if water rises from a different drain, or if sewage odor returns after cleaning, the blockage is likely farther down the line. At that point, a licensed plumber can inspect the system safely.