 By Claire Whitaker
Updated November 2026
Kitchen sink drain pipe parts are the components that carry water and waste from your sink basin to the main drain line in the wall or floor. Knowing what each piece does lets you spot a leak, pick the right replacement, and reassemble the setup without guesswork. This guide walks through the main parts, how to identify them, a step-by-step replacement process, and the mistakes that cause repeat leaks.
What Makes Up a Kitchen Sink Drain Assembly
Most kitchen sink drains share the same basic layout, even if the materials differ. Water drops through the strainer, passes a drain body under the sink, then moves through a short run of pipe called the tailpiece. A trap sits below that, and a branch line joins the wall drain. Each joint is sealed with a gasket, slip nut, or washer. When one of these fails, you usually see water beneath the cabinet or slow drainage.
Shopping for one? See our guide: 6 Best Kitchen Sink Drain Strainer Picks for Every Sink (2026).
The Main Components
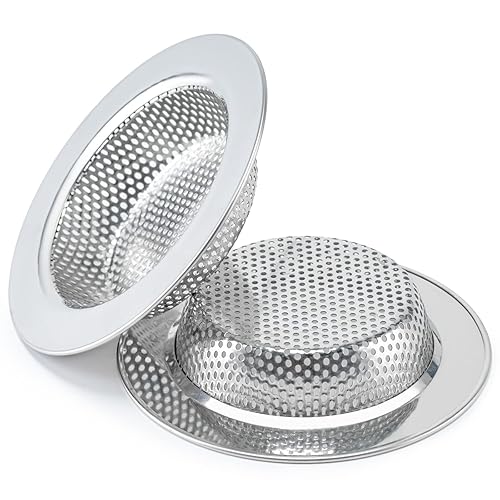
- Strainer assembly: The flange and basket that sit in the sink opening and hold the stopper or strainer.
- Drain body: The threaded or flanged piece that connects the strainer to the rest of the drain.
- Tailpiece: The straight pipe, usually 1-1/2 inches in diameter, running down from the drain body.
- P-trap: The U-shaped bend that holds water to block sewer gas.
- Trap arm (or waste arm): The horizontal pipe that carries water from the trap to the wall drain.
- Slip nuts and washers: Plastic or metal nuts with rubber or fiber washers that seal each joint.
- Dishwasher and disposal connections: Side inlets or branch fittings that add water from appliances.
How to Identify Your Drain Pipe Parts Before Buying
Before you buy any replacement, take a few measurements and note the materials. Mismatched diameters and thread types are the most common reason a new part won’t seal. Plastic (PVC or polypropylene) and metal (chrome-plated brass or steel) pieces often look similar but do not always fit together.
Measure the Pipe Diameter
Most kitchen sink tailpieces and trap arms use 1-1/2 inch pipe. Some older installations or bar sinks use 1-1/4 inch. Use a tape measure across the outside of the pipe, or check the inside with calipers if you have them. Compare the number to the diameter printed on the part packaging or in the manufacturer’s specifications.
Check the Thread and Joint Type
Slip-joint connections use a nut and washer that slide over the pipe and tighten against a beveled washer. Threaded connections screw together and often require pipe tape or a sealant. Some drain bodies use a compression fitting. Note which type you have before ordering.
Note the Material
| Material | Typical Use | Cutting and Joining | Common Issue |
|---|---|---|---|
| Chrome-plated brass | Visible tailpieces, strainer bodies | Hand-tighten slip nuts; avoid overtightening | Corrosion and pitting near the nut |
| PVC | Trap, trap arm, most hidden runs | Cut with a hacksaw or pipe cutter; solvent-weld or use slip joints | Cracks from overtightening plastic nuts |
| Polypropylene | Modern slip-joint traps and tailpieces | Hand-tighten; reuse washers only if undamaged | Gasket flattening and seepage |
| Stainless steel flex | Temporary or hard-to-fit runs | Trim to length and secure | Kinking and restricted flow |
Step-by-Step: Replacing a Leaking Kitchen Sink Drain Section
Most homeowners can replace a trap, trap arm, or tailpiece with basic tools in under an hour. Work methodically and check each joint before you turn on the water.
Tools and Supplies You Will Need
- Bucket and towels or a shallow pan
- Adjustable wrench or pliers with a protective cloth
- Replacement trap, trap arm, or tailpiece (matched to diameter)
- New slip nut washers (usually included in kits)
- Plumber’s tape or silicone-free pipe thread compound, if threaded
- Flashlight and a small brush for cleaning gasket seats
- Hacksaw or pipe cutter if you need to shorten a pipe
Step 1: Shut Off and Drain
Place the bucket under the trap and clear everything from the cabinet. Old drain water can hold grease and food debris, so keep towels nearby. If the sink has a disposal, unplug it first.
Step 2: Loosen the Slip Nuts
Turn each slip nut counterclockwise by hand first. If it resists, use pliers, but wrap the nut in a cloth to avoid cracking plastic. Remove the trap section and let remaining water drain into the bucket.
Step 3: Inspect Each Joint
Look for a flattened or torn washer, mineral buildup, or a hairline crack in the plastic. Check the drain body threads for corrosion. Clean the seat with a brush, since a single grain of debris can cause a leak.
Step 4: Dry-Fit the New Parts
Assemble the new trap and arm without tightening. Confirm the trap sits level, the arm slopes slightly toward the wall drain at about 1/4 inch per foot, and the tailpiece lines up squarely. Cut pipe if needed, deburr the cut edge, and recheck the fit.
Step 5: Tighten and Test
Hand-tighten every slip nut, then add about a quarter turn with pliers. Overtightening plastic is the most common cause of cracked nuts. Run water at the sink, watch every joint for 5 minutes, and check again after the water has been running for a few minutes.
Common Mistakes to Avoid
- Overtightening plastic nuts. Once cracked, the nut must be replaced. Hand-tight plus a quarter turn is enough.
- Reusing a flattened washer. Replace washers whenever you open a joint, even if they look intact.
- Mixing diameters. A 1-1/4 inch trap will not seal a 1-1/2 inch tailpiece, even with extra tape.
- Skipping the slope. A flat or reversed trap arm causes slow drainage and gurgling.
- Forgetting the dishwasher connection. If your dishwasher drains through the sink, reconnect the hose before testing.
Recommended gear
A pipe cutter gives cleaner, squarer cuts on PVC than a hacksaw, which helps joints seal on the first try. View on Amazon
A basin wrench reaches the slip nuts on the back of a faucet or drain body that a standard wrench cannot. View on Amazon
A slip joint washer and gasket kit covers the common sizes so you do not need to buy each washer separately. View on Amazon
Tips for Long-Lasting Drain Joints
Inspect the trap every six months for mineral buildup or slow sections. Keep a spare set of washers in your tool drawer, since they are inexpensive and often needed during a repair. If you want to pair drain work with a broader overhaul, see Kitchen Faucet With Single Handle: Types, Parts and How to Choose for guidance on compatible faucet hardware, and How to Unclog a Kitchen Sink: 6 Methods That Work Fast if slow drainage is your main symptom.
FAQ
What size pipe do most kitchen sink drains use?
Most kitchen sink tailpieces and trap arms use 1-1/2 inch pipe. Some older or bar sink setups use 1-1/4 inch, so measure before buying.
Can I replace a P-trap without shutting off water?
You do not need to shut off the supply because the trap is on the drain side. You do need to drain standing water first and expect some residual water to spill.
Why does my new slip nut keep leaking?
The usual causes are a flattened or missing washer, a damaged seat, or a joint that is not square. Disassemble, clean the seat, replace the washer, and retighten by hand plus a quarter turn.
Do I need plumber’s tape on slip joints?
Slip joints seal with washers, not thread tape. Use tape or compound only on threaded connections.
How do I know if my drain arm is sloped correctly?
A trap arm should drop about 1/4 inch per foot toward the wall connection. A level placed on the pipe can confirm the slope.
Can I use PVC for a kitchen sink drain?
Yes, PVC and polypropylene are common for traps and arms. Choose the material your existing setup uses, and avoid mixing materials at a joint without an appropriate adapter.
When should I call a professional?
If you see water damage in the wall, corrosion in the main drain line, or repeated leaks after correct installation, consult a licensed plumber. Structural or code questions should also go to a professional.
Conclusion
Kitchen sink drain pipe parts work as a sealed system, and most leaks trace back to one worn washer or a misaligned joint. Measure the diameter, identify the material, and replace only what is damaged. Hand-tighten carefully, test under running water, and keep a spare washer set on hand for the next repair.
Related reading
- Top 7 Stainless Steel Kitchen Sink Maintenance Products Compared
- Kitchen Sink Faucet Bronze: 7 Finishes and Buying Tips (2026)
- Kitchen Sink Faucet Black: Finishes, Care and Buying Tips
Ready to choose one?
About Claire Whitaker
Claire Whitaker is part of our editorial team and reviews and edits our kitchen faucets & sinks guides, checking product details against manufacturer specifications and owner feedback.