By Caleb Morgan
Updated November 2026
Delta bathtub faucet parts are the cartridge, stem, seats, springs, O-rings, handle screws, and diverter components that control water flow, temperature, and the tub-to-shower switch. In this guide you will learn how to identify the faucet series you have, figure out which delta bathtub faucet parts are failing, source exact replacements, and install them without damaging the finish. Most leaks and drips trace back to a handful of worn components, so the work is often simpler than it looks.
Why Identifying Your Delta Faucet Series Comes First
Delta has produced many bathtub faucet lines over the decades, and parts that look similar are often not interchangeable. A cartridge from one series may have a different height, stem length, or spline count than another. Before you buy anything, confirm the exact model. If you are still deciding which faucet you own, our overview of Delta Bathtub Faucet Replacement Parts: Find and Install the Right Ones explains how to match components to a specific model.
Shopping for one? See our guide: 7 Best Repair Delta Bathtub Faucet Parts and Kits for Leaks (2026).
Start by checking the back plate, the escutcheon (the decorative ring around the handle), or the packaging if you still have it. Delta typically stamps a model or series number on the valve body or includes it in the installation sheet. Write it down along with the finish, such as chrome, brushed nickel, or Champagne Bronze.
Where to Find the Model Number
- The handle: many models print the series name on the underside of the handle or the inside of the trim plate.
- The valve body: remove the trim and look for a casting number or stamped code near the cartridge.
- The original box or receipt, if you saved them.
- Delta’s own parts lookup tools, which list components by model number.
The Main Delta Bathtub Faucet Parts and What They Do
Understanding the function of each component makes troubleshooting much faster. A bathtub faucet is more complex than a basic sink faucet because it includes a diverter that sends water to the showerhead.
| Part | Function | Typical Symptom When Worn |
|---|---|---|
| Cartridge | Controls hot/cold mixing and flow volume | Drip from spout, temperature changes suddenly |
| Stem (on older compression models) | Presses onto the seat to shut off water | Dripping that worsens when handle is closed |
| Seats and springs | Create the seal and push back against the stem | Steady drip, rough handle action |
| O-rings and seals | Prevent water from leaking around moving parts | Water at the base of the handle or spout |
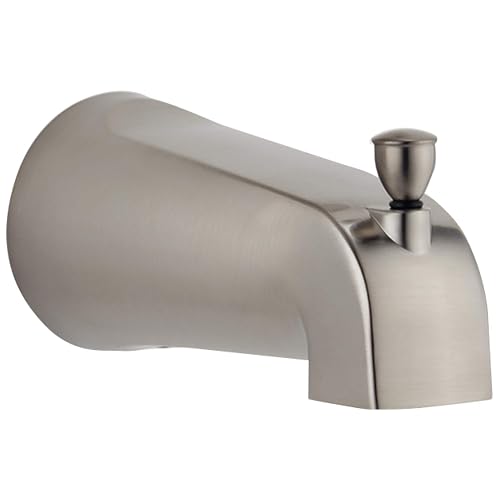
| Diverter | Redirects water between tub spout and showerhead | Water stays in the tub when showering, or spray is weak |
| Handle screw and cap | Secures the handle to the valve stem | Handle wobbles or spins freely |
Diagnosing Which Delta Bathtub Faucet Parts Need Replacement
Before you order anything, pinpoint the problem. A drip from the spout usually points to the cartridge or seats, while water leaking from the wall behind the handle often means worn O-rings or a cartridge that has cracked. Turn off the water supply and test the faucet with the handle closed to see where the water is coming from.
- Close the handle fully and check whether water still exits the spout. If it does, the cartridge or seats are likely worn.
- Check the shower diverter by switching to shower mode. If water still pours from the tub spout, the diverter may be clogged or worn.
- Look for water around the base of the handle or behind the trim plate. This typically indicates seal or O-ring failure.
- Feel for handle play. A loose handle often means a worn cartridge stem or a loose handle screw.
How to Replace a Delta Bathtub Cartridge
Most modern Delta tub faucets use a single-handle cartridge, which is the most common replacement. Manufacturers generally specify that you should turn off the water at the main or the local shutoff valves before starting. Open the faucet to relieve remaining pressure.
Tools and Supplies You Will Need
- Phillips screwdriver and flathead screwdriver
- Allen (hex) wrench, usually 3/32-inch or 5/64-inch depending on the model
- Needle-nose pliers or a cartridge puller
- Plumber’s silicone grease
- Soft cloth to protect the finish
- Replacement cartridge matched to your series
Step-by-Step Cartridge Replacement
- Shut off the water supply and open the faucet to drain residual water.
- Remove the decorative cap or button from the handle, then remove the handle screw.
- Lift off the handle and unscrew the trim plate or escutcheon. Wrap it in cloth so it does not scratch.
- Remove the retaining clip or nut that holds the cartridge in place. Delta often uses a clip that lifts out with a flathead screwdriver.
- Pull the cartridge straight out using pliers or a cartridge puller. Avoid twisting it sideways, which can damage the valve body.
- Compare the old and new cartridges side by side to confirm they match in height, stem design, and spline count.
- Apply a thin layer of silicone grease to the new cartridge’s O-rings, then insert it with the index tab aligned correctly.
- Reinstall the clip, trim, handle, and cap. Turn the water on slowly and test both hot and cold, plus the diverter.
For a more detailed walkthrough tailored to this process, see Delta Bathtub Faucet Cartridge: How to Replace One in 6 Steps. If you suspect multiple small components are worn, a full kit may be more practical than replacing parts one at a time. Delta Bathtub Faucet Repair Kit: Step-by-Step Fix for Leaks and Drips covers when a kit makes more sense.
Replacing Stems, Seats, and Springs on Older Models
Older Delta tub faucets, particularly two-handle compression designs, rely on stems, seats, and springs rather than a cartridge. The repair is more labor-intensive but still manageable.
- Shut off the water and remove the handle, packing nut, and stem as with any compression faucet.
- Inspect the rubber washer at the bottom of the stem. Replace it if it is cracked, flattened, or hardened.
- Check the brass seat inside the valve body. If it is pitted or rough, a seat wrench can remove it for replacement.
- Replace the spring if it appears compressed or corroded. Install all parts in the same orientation as the originals.
- Reassemble and test slowly, checking for leaks at the packing nut and at the spout.
For guidance on stems specifically, our article on Replace Delta Faucet Stem: 7 Best Repair Kits Compared for 2026 compares the kits available for this type of repair.
Fixing the Diverter and Shower Switch
If water keeps coming out of the tub spout when you switch to the showerhead, the diverter is the likely culprit. Mineral deposits are the most common cause, especially in areas with hard water. Remove the diverter stem, soak it in white vinegar for several hours, and scrub gently with a soft brush. If the diverter gate or spring is cracked or no longer returns fully, replace the entire diverter assembly rather than attempting to repair it.
Tip: When buying a replacement diverter, match it to your existing spout design. Tub-spout diverters and shower-arm diverters are not always interchangeable.
Common Mistakes to Avoid
- Ordering parts without confirming the model. Even a small height difference can cause a cartridge to sit improperly and leak.
- Forcing the cartridge. If it does not come out easily, check for a retaining clip or nut before applying more pressure.
- Skipping the grease. Silicone grease on O-rings reduces friction and prevents tearing during installation.
- Overtightening the handle screw. This can crack the cartridge stem or damage the handle.
- Scratching the finish. Always protect chrome, nickel, and bronze surfaces with cloth or painter’s tape when using tools.
- Replacing everything when only one part is worn. Diagnose first to avoid unnecessary work.
Recommended gear
A few supplies make these repairs cleaner and more reliable.
- Plumber’s silicone grease: Lubricates O-rings during reassembly and helps prevent leaks. View on Amazon
- Cartridge puller tool: Gives you a secure grip on stuck cartridges without damaging the valve body. View on Amazon
- Hex key set: Covers the Allen sizes used in many Delta handles and trim pieces. View on Amazon
- Non-abrasive microfiber cloths: Protect the finish while you work and wipe down components before reassembly. View on Amazon
FAQ
How do I know which Delta bathtub faucet parts I need?
Identify your exact series from the handle, valve body, or original packaging, then diagnose the symptom. A drip from the spout usually means the cartridge or seats, while leaks at the handle point to O-rings or seals.
Are Delta bathtub cartridges universal?
No. Cartridges vary by series, height, and spline count. Always match the cartridge to your model number before buying.
Can I replace a Delta cartridge without removing the tub spout?
In most cases, yes. The cartridge is accessed through the wall behind the handle trim, so the spout usually stays in place.
Why does my Delta tub faucet still drip after replacing the cartridge?
Common reasons include an incorrectly seated cartridge, a damaged valve seat, debris in the valve body, or a cartridge that does not match the model. Turn off the water, recheck the alignment, and clean the valve body before reassembling.
How long do Delta bathtub faucet parts typically last?
Manufacturers generally indicate that cartridges and seals last for years under normal use. Hard water, debris in the supply line, and frequent use can shorten their life.
Why is my shower weak after switching from the tub spout?
The diverter may be clogged with mineral deposits or the shower arm may be restricted. Clean the diverter and inspect the showerhead for blockage.
When should I call a professional?
If you encounter corroded valve bodies, damaged supply lines, or leaks inside the wall, consult a licensed plumber. Structural or concealed water damage should be assessed by a professional.
Conclusion
Delta bathtub faucet parts are straightforward to replace once you identify your exact model and diagnose the failing component. Start with the symptom, confirm the series, and match the cartridge, seats, or diverter carefully. With the right tools and a bit of patience, most repairs can be completed in under an hour, restoring smooth operation and a leak-free tub.
Ready to choose one?
About Caleb Morgan
Caleb Morgan is part of our editorial team and reviews and edits our kitchen faucets & sinks guides, checking product details against manufacturer specifications and owner feedback.