By Caleb Morgan
Updated November 2026
A Kohler Artifacts bathtub faucet is a sturdy, good-looking fixture, but like any valve it will eventually drip, lose pressure or stick. This guide shows you how to identify your exact Kohler Artifacts bathtub faucet, figure out what is actually failing, and carry out the most common repairs yourself. You will also learn how to keep the finish looking good so you rarely have to repeat the job.
Identify Your Kohler Artifacts Bathtub Faucet Before You Buy Parts
Kohler sells the Artifacts line in several configurations, and the parts that fit one trim style rarely fit another. Before you order anything, confirm the model, the valve type and the handle style. Getting this wrong is the most common reason repairs drag on for weeks.
Check the Model Number and Valve Type
Look for the model number stamped on the valve body or printed on the installation sheet that came with the faucet. If the paperwork is gone, you can often find the number on the underside of the trim plate or behind the handle when you remove it. Note whether the valve is a single-handle or a two-handle design, and whether it uses a diverter for the tub spout and handshower.
Determine the Cartridge Type
Most single-handle Kohler tub and shower valves use a cartridge, which is a removable insert that controls water flow and temperature. Two-handle valves typically use compression stems or ceramic disc cartridges depending on the era and model. Pull the handle, remove the trim and inspect the valve body before buying a replacement cartridge. Measure or photograph the cartridge and compare it against the manufacturer’s parts diagram.
Diagnose the Problem Before You Take It Apart
A drip, low flow and a stiff handle can all come from different parts. Spend ten minutes diagnosing the symptom so you replace only what is needed.
| Symptom | Most likely cause | First thing to check |
|---|---|---|
| Drip from the spout when off | Worn cartridge or seat | Confirm water is coming through the valve, not a supply leak |
| Water leaking from handle base | Worn O-rings or cartridge seal | Check the escutcheon and cartridge retaining nut |
| Low flow at the tub spout | Clogged screen or diverter | Clean the spout outlet and diverter stem first |
| Stiff or hard-to-turn handle | Mineral buildup or worn cartridge | Inspect the cartridge for scale |
| Water coming from the shower head when tub spout is on | Diverter not sealing | Clean and test the diverter |
| Temperature changes suddenly | Cartridge or pressure-balance issue | Check whether the cold and hot supply pressures are balanced |
Tools and Materials You Will Need
- Adjustable wrench or a basin wrench for hard-to-reach nuts
- Phillips and flat-head screwdrivers
- Allen (hex) key set, usually 3/32 inch or 1/8 inch for set screws
- Cartridge puller tool, if the cartridge is stuck
- White vinegar and an old toothbrush for mineral deposits
- Plumber’s silicone grease, applied sparingly to O-rings
- Painter’s tape and a soft towel to protect the finish
- Replacement cartridge, O-rings and escutcheon seal matched to your model
Step-by-Step: Replace the Cartridge in a Single-Handle Artifacts Valve
Replacing the cartridge is the most common fix for a dripping or stiff single-handle tub and shower faucet. The job usually takes 30 to 60 minutes if you have the right parts.
Shut Off the Water Supply
Close the shutoff valves for the tub and shower. If your home has no individual shutoffs, turn off the main water supply to the house and open a tub faucet to release residual pressure. Keep a towel in the drain to catch small parts.
Remove the Handle and Trim
Pry off the decorative cap on the handle, usually with a flat-head screwdriver wrapped in tape. Remove the handle screw with a Phillips driver or hex key, then lift the handle off. Unscrew the trim plate and escutcheon. Place small components in a labeled bag as you go.
Pull the Cartridge
Remove the retaining clip or nut that holds the cartridge in place. Grip the cartridge with pliers wrapped in tape, or use a cartridge puller, and work it straight out. If it resists, do not force it sideways, because that can crack the valve body. Gently rock it while pulling.
Install the New Cartridge
- Lightly lubricate the new O-rings with plumber’s silicone grease.
- Align the cartridge’s index tab with the notch in the valve body. Most cartridges only seat one way.
- Press it in firmly until it sits flush.
- Reinstall the retaining clip or nut and the trim plate.
- Replace the handle, tighten the screw and snap on the cap.
Test the Valve
Turn the water back on slowly. Run the tub spout and shower head, check for leaks at the handle and spout, and confirm the diverter switches cleanly. Let the water run hot and cold to confirm both sides respond correctly.
Clean and Repair the Diverter and Spout
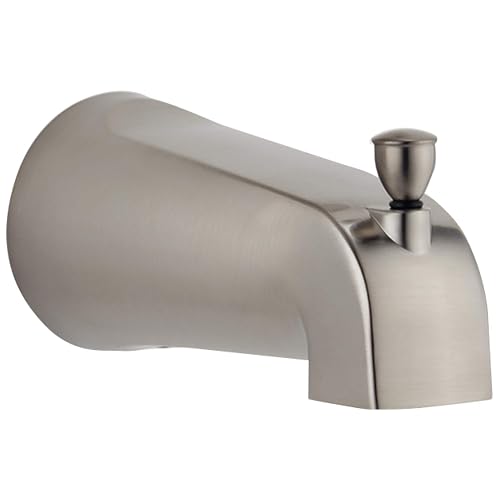
If your Artifacts tub spout has weak flow or the shower head runs while the tub spout is on, the diverter is the likely culprit. Remove the spout, which typically unscrews counterclockwise, and soak the diverter stem and spout outlet in white vinegar for 30 minutes. Scrub away scale with a soft brush. Reinstall the parts with a bit of thread sealant on the spout threads, and test again. A diverter repair kit matched to your model is the right choice if the rubber seal itself is worn.
Restore and Protect the Finish
Kohler finishes are durable, but harsh cleaners and abrasive pads can dull or scratch them over time. Wipe the faucet with warm water and mild dish soap after use, then dry it with a microfiber cloth. Avoid bleach-based cleaners and scouring powders. For hard water spots, a vinegar-dampened cloth works well, followed by a rinse and dry. Check the manufacturer’s care instructions for your specific finish, since some finishes call for different products.
Common Mistakes
- Buying parts before confirming the model. Two Artifacts trims can look nearly identical but use different cartridges.
- Forcing a stuck cartridge. Sideways pressure can crack the valve body, turning a cheap repair into a full valve replacement.
- Over-greasing O-rings. Too much silicone grease can attract debris and make handles feel gritty.
- Skipping the water shutoff test. Always confirm the supply is off before you remove the handle.
- Reusing worn O-rings. Replace them whenever you swap a cartridge; they are inexpensive insurance against a second leak.
- Using abrasive cleaners on the finish. Scratches are permanent and often show more than the original wear.
Recommended gear
These supplies genuinely help with a cartridge swap and routine upkeep, and they are widely available.
- Cartridge puller set: Gives you a firm, controlled grip on a stuck cartridge without damaging the valve body. View on Amazon
- Plumber’s silicone grease: A small tube lubricates O-rings so they seal well and the handle turns smoothly. View on Amazon
- Basin wrench: Useful for reaching nuts in tight spaces behind the tub or valve trim. View on Amazon
- Hex key set: Many Kohler handles use set screws that require a hex key of the correct size. View on Amazon
If you are working through a broader repair, these related guides cover adjacent topics: Kohler Artifacts Faucet Bathroom Review: Features and Performance, Artifacts Kohler Kitchen Faucet: Identify, Clean and Fix It (Step-by-Step) and Kohler Faucet Bathroom Sink: How to Choose, Install and Fix One. For a broader look at how Kohler parts are identified, see Kohler Kitchen Faucet Parts: How to Identify and Replace the Right Ones.
FAQ
Can I replace a Kohler Artifacts cartridge without shutting off the main water?
Often yes, if your tub and shower have individual shutoff valves. If they do not, you will need to shut off the main supply to avoid water spraying when you remove the handle.
How do I know if my cartridge or my seat is causing the drip?
Remove the cartridge and check whether the drip stops when water is off at the valve. A worn seat often needs a specialized seat wrench, while a worn cartridge usually shows scratches, scale or cracked seals.
Why is my Artifacts tub faucet hard to turn after cleaning?
Mineral scale inside the cartridge or O-rings can make the handle stiff. Soaking the cartridge in white vinegar and lubricating the O-rings with silicone grease usually restores smooth movement.
Do I need to remove the tub spout to fix low flow?
Not always. Start by checking for debris in the spout outlet and the diverter. Removing the spout is usually necessary only if the diverter itself is clogged or worn.
What is the safest way to clean a Kohler Artifacts faucet finish?
Use warm water with mild dish soap and a soft cloth. Avoid bleach, abrasive powders and scouring pads, and dry the faucet after cleaning to prevent water spots.
Should I call a plumber for this repair?
Cartridge swaps and diverter cleaning are within reach for most homeowners. If you find corroded supply lines, a leak inside the wall, or a valve body that is cracked, consult a licensed plumber before continuing.
Are Kohler Artifacts parts interchangeable with other Kohler lines?
Sometimes, but not reliably. Compare the cartridge type, dimensions and index tab position against the exact replacement part before installing it.
Conclusion
Identifying your exact Kohler Artifacts bathtub faucet model is the key step that makes every repair go smoothly. Most problems come down to a worn cartridge, a clogged diverter or mineral buildup, and each can be fixed with basic tools and matched parts. Clean the finish gently, replace O-rings during every cartridge job, and your faucet should keep running cleanly for years.
Ready to choose one?
About Caleb Morgan
Caleb Morgan is part of our editorial team and reviews and edits our kitchen faucets & sinks guides, checking product details against manufacturer specifications and owner feedback.